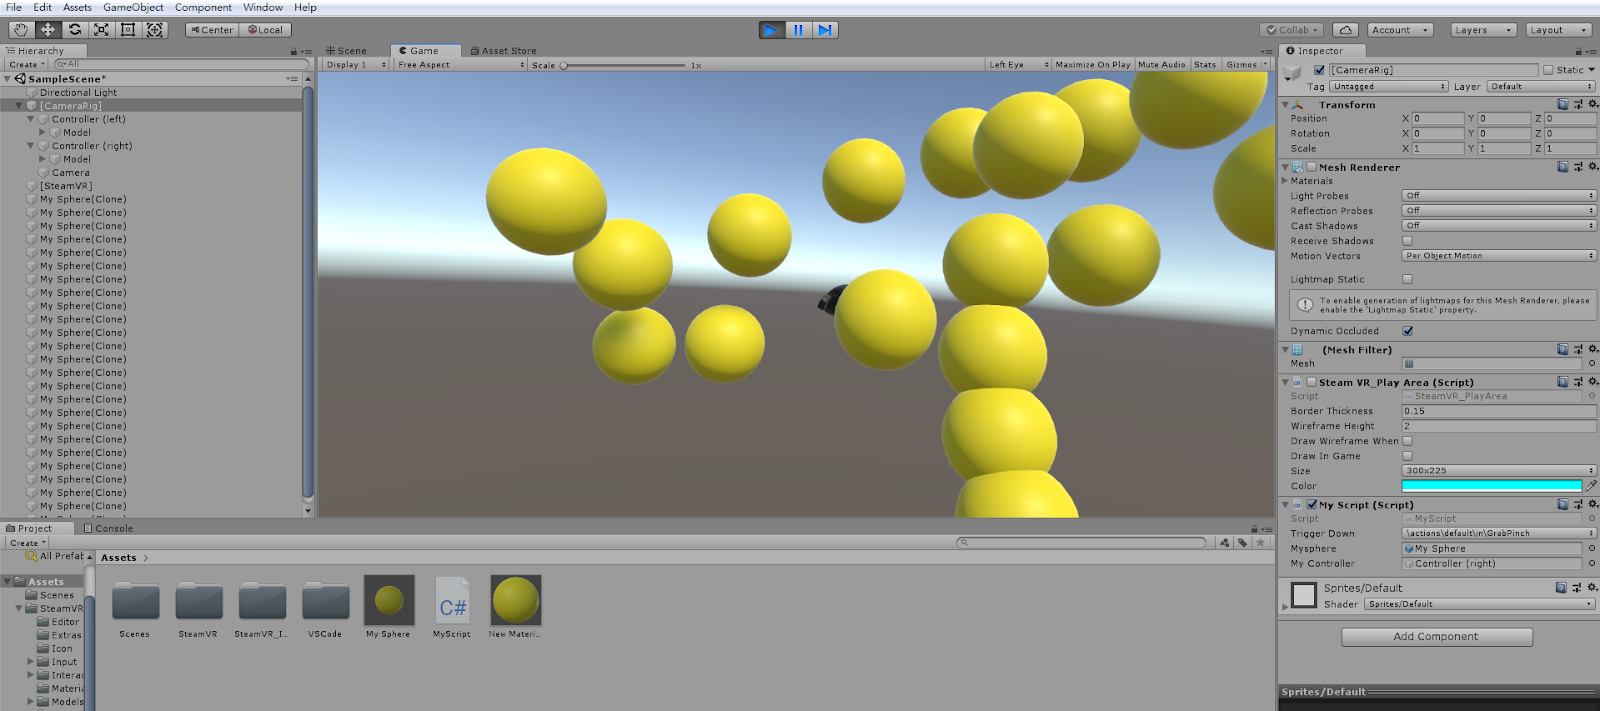
手把變出球

X++;

X++; Y++;

球隨手把出現

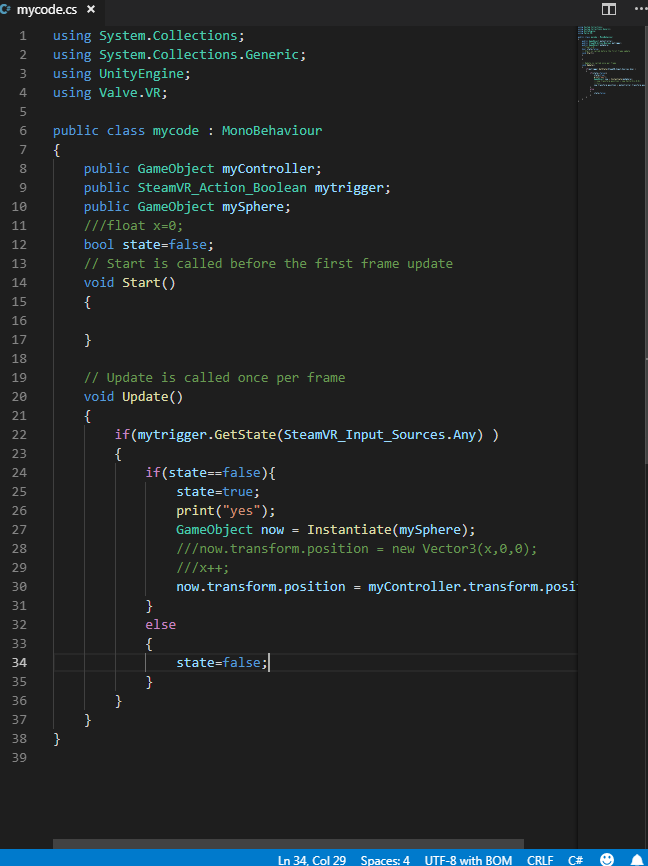
using System.Collections;
using System.Collections.Generic;
using UnityEngine;
using Valve.VR;
public class MyScript : MonoBehaviour
{
public SteamVR_Action_Boolean triggerDown;
// Start is called before the first frame update
public GameObject mysphere;
//宣告了一個名叫mysphere的變數,它的形態是GameObject
public GameObject myController;
bool state=false;
//state是否有按
void Update()
{
if(triggerDown.GetState(SteamVR_Input_Sources.Any))
{
if(state==false)
{
state=true;
print("triggerDown");
GameObject now=Instantiate(mysphere);
//now.transform.position = new Vector3(x,0,0); //
物件位置為座標點(x,0,0)
//x++;
now.transform.position=myController.transform.position;
}
}
else
{
state=false;
}
}
}