期末作品展示
第七組 密室逃脫
組員:05161181 梁傳宗、05161120 徐譽嘉、05160222 郭宇傑、05160425 陳亭光
介紹:玩家需完成關卡,以取得密碼逃出密室
操作:利用兩手的TouchPad移動角色,按壓Trigger拿取物品
影片:https://www.youtube.com/watch?v=KYoq4XfNGC4&feature=youtu.be
2019年6月11日 星期二

2019年6月4日 星期二
week16 Jie
關卡整合
1.碰取七巧板以進入七巧板關卡

2.完成七巧板後過關回到原本的房間
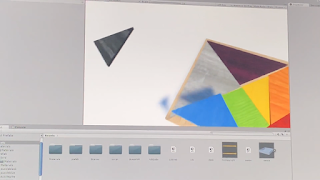
3.可以看到保險箱顯示其中一個密碼

4.碰取鳥模型以進入投影關卡

5.旋轉鳥模型以過關回到原本的房間

6.可以看到保險箱顯示了密碼

7.按完密碼打開門以取得裡面的提示

8.和梳子做結合,取得大門密碼

9.按完密碼後即過關

10.過關畫面

1.碰取七巧板以進入七巧板關卡

2.完成七巧板後過關回到原本的房間

3.可以看到保險箱顯示其中一個密碼

4.碰取鳥模型以進入投影關卡

5.旋轉鳥模型以過關回到原本的房間

6.可以看到保險箱顯示了密碼

7.按完密碼打開門以取得裡面的提示

8.和梳子做結合,取得大門密碼

9.按完密碼後即過關

10.過關畫面

2019年5月28日 星期二
week15 Jie
七巧板製作
1.將事先建好的七巧板模型匯入Unity,並加入Mesh Coilder以利後面做碰撞偵測

2.加入程式碼拿起七巧板

程式碼如下:
void OnTriggerStay(Collider col) {
if (device.GetPress(SteamVR_Controller.ButtonMask.Trigger) && col.tag!="desk"){
//Debug.Log ("抓起");
// 將 physics(物理引擎) 關掉
col.attachedRigidbody.isKinematic = true;
// 設定controller為parent
col.gameObject.transform.SetParent(gameObject.transform);
}
if (device.GetPressUp (SteamVR_Controller.ButtonMask.Trigger)) {
col.gameObject.transform.SetParent (null);
col.attachedRigidbody.isKinematic = false;
//GameObject.Destroy (col.gameObject, 3f);
//tossObject (col.attachedRigidbody);
}
}
3.過關條件判斷
單個七巧板放置在木板上時,設定布林值為真。當所有的七巧板都放在木板上,每塊七巧板的布林值皆為真,即達成過關條件
布林值條件程式碼:
void OnCollisionStay(Collision other) {
if(other.gameObject.tag=="desk")
blue=true;
}
void OnCollisionExit(Collision other) {
if(other.gameObject.tag=="desk")
blue=false;
}
過關條件程式碼:
void Update () {
device = SteamVR_Controller.Input ((int)trackedObj.index);
if(col_blue.blue&&col_gray.gray&&col_green.green&&col_orange.orange&&col_yellow.yellow&&col_purple.purple&&col_red.red&&col_black.black)
{
puzzover=true;
SceneManager.LoadScene ("start_menu");
}
}
4.加入移動角色的程式碼,好移動拿取七巧板
(以原先旋轉物體的程式碼做修改)
程式碼:
using System.Collections;
using System.Collections.Generic;
using UnityEngine;
public class tranlate : MonoBehaviour
{
// Start is called before the first frame update
SteamVR_TrackedObject trackedObj;
SteamVR_Controller.Device device,deviceLeft,deviceRight;
public GameObject obj;
float a=0.0f,b=0.0f,c=0.0f;
Vector2 rotat=new Vector2(0.0f,0.0f);
void Start()
{
trackedObj=GetComponent<SteamVR_TrackedObject>();
a=obj.transform.position.x;
b=obj.transform.position.y;
c=obj.transform.position.z;
}
// Update is called once per frame
void Update()
{
device = SteamVR_Controller.Input ((int)trackedObj.index);
if (device.GetPress (SteamVR_Controller.ButtonMask.Touchpad)){
rotat = device.GetAxis ();
float angle=Vector2.Angle (new Vector2 (1, 0), rotat);
if (angle > 45 && angle < 135) {
if (rotat.y > 0)
c+=0.02f;
else
c-=0.02f;
}
else {
if (rotat.x>0)
a+=0.02f;
else
a-=0.02f;
}
}
obj.transform.position = (new Vector3 (a, b, c));
1.將事先建好的七巧板模型匯入Unity,並加入Mesh Coilder以利後面做碰撞偵測

2.加入程式碼拿起七巧板

程式碼如下:
void OnTriggerStay(Collider col) {
if (device.GetPress(SteamVR_Controller.ButtonMask.Trigger) && col.tag!="desk"){
//Debug.Log ("抓起");
// 將 physics(物理引擎) 關掉
col.attachedRigidbody.isKinematic = true;
// 設定controller為parent
col.gameObject.transform.SetParent(gameObject.transform);
}
if (device.GetPressUp (SteamVR_Controller.ButtonMask.Trigger)) {
col.gameObject.transform.SetParent (null);
col.attachedRigidbody.isKinematic = false;
//GameObject.Destroy (col.gameObject, 3f);
//tossObject (col.attachedRigidbody);
}
}
3.過關條件判斷
單個七巧板放置在木板上時,設定布林值為真。當所有的七巧板都放在木板上,每塊七巧板的布林值皆為真,即達成過關條件
布林值條件程式碼:
void OnCollisionStay(Collision other) {
if(other.gameObject.tag=="desk")
blue=true;
}
void OnCollisionExit(Collision other) {
if(other.gameObject.tag=="desk")
blue=false;
}
過關條件程式碼:
void Update () {
device = SteamVR_Controller.Input ((int)trackedObj.index);
if(col_blue.blue&&col_gray.gray&&col_green.green&&col_orange.orange&&col_yellow.yellow&&col_purple.purple&&col_red.red&&col_black.black)
{
puzzover=true;
SceneManager.LoadScene ("start_menu");
}
}
4.加入移動角色的程式碼,好移動拿取七巧板
(以原先旋轉物體的程式碼做修改)
程式碼:
using System.Collections;
using System.Collections.Generic;
using UnityEngine;
public class tranlate : MonoBehaviour
{
// Start is called before the first frame update
SteamVR_TrackedObject trackedObj;
SteamVR_Controller.Device device,deviceLeft,deviceRight;
public GameObject obj;
float a=0.0f,b=0.0f,c=0.0f;
Vector2 rotat=new Vector2(0.0f,0.0f);
void Start()
{
trackedObj=GetComponent<SteamVR_TrackedObject>();
a=obj.transform.position.x;
b=obj.transform.position.y;
c=obj.transform.position.z;
}
// Update is called once per frame
void Update()
{
device = SteamVR_Controller.Input ((int)trackedObj.index);
if (device.GetPress (SteamVR_Controller.ButtonMask.Touchpad)){
rotat = device.GetAxis ();
float angle=Vector2.Angle (new Vector2 (1, 0), rotat);
if (angle > 45 && angle < 135) {
if (rotat.y > 0)
c+=0.02f;
else
c-=0.02f;
}
else {
if (rotat.x>0)
a+=0.02f;
else
a-=0.02f;
}
}
obj.transform.position = (new Vector3 (a, b, c));
2019年5月21日 星期二
week14 Jie
旋轉物件(四)
完成後跟老師討論,發現按壓旋轉的方式非常不方便,於是更改為滑動方式並加入過關條件
1.更改程式碼如下
using UnityEngine;
using System.Collections;
using UnityEngine.SceneManagement;
[RequireComponent(typeof(SteamVR_TrackedObject))]
public class ControllerTest : MonoBehaviour {
SteamVR_TrackedObject trackedObj;
SteamVR_Controller.Device device,deviceLeft,deviceRight;
public GameObject obj;
float a=0.0f,b=0.0f,c=0.0f;
Vector2 rotat=new Vector2(0.0f,0.0f);
public static bool over=false;
void Start () {
trackedObj=GetComponent<SteamVR_TrackedObject>();
a=obj.transform.rotation.x;
b=obj.transform.rotation.y;
c=obj.transform.rotation.z;
}
// Update is called once per frame
Vector2 tp2;
bool bTouched=false;
void Update () {
device = SteamVR_Controller.Input ((int)trackedObj.index);
var leftHand = SteamVR_Controller.GetDeviceIndex(SteamVR_Controller.DeviceRelation.Leftmost);
deviceLeft = SteamVR_Controller.Input (leftHand);
var rightHand = SteamVR_Controller.GetDeviceIndex(SteamVR_Controller.DeviceRelation.Rightmost);
deviceRight = SteamVR_Controller.Input (rightHand);
Vector2 tp=Vector2.zero,tp1=Vector2.zero;
if (device.GetTouch (SteamVR_Controller.ButtonMask.Touchpad)){
//由原先的GetPress更改為GetTouch
tp2 = tp1;//備份第一次碰到的位置
tp1 = device.GetAxis ();//備份完後再讀取Touchpad碰到的位置
if(bTouched){
rotat=tp1-tp2;
//print("tp1:"+tp1+"\n");
//print("tp2:"+tp2);
//print("diff:"+ (tp1-tp2));
///....
float angle=Vector2.Angle (new Vector2 (1, 0), rotat);
if (angle > 45 && angle < 135) {
if (rotat.y > 0){
a+=3.0f;
if(a>180.0f)
a%=180.0f;
}
else{
a-=3.0f;
if(a<-180.0f)
a%=180.0f;
}
}
else {
if (rotat.x>0){
b+=3.0f;
if(b>180.0f)
b%=180.0f;
}
else{
b-=3.0f;
if(b<-180.0f)
b%=180.0f;
}
}
}
bTouched=true;
}
else
bTouched=false;
obj.transform.rotation = Quaternion.Euler (new Vector3 (a, b, c));
if((a<=-5.0f && a>=-25.0f) && (b<=80.0f && b>=60.0f)){
//若物件達到指定角度
over=true;
SceneManager.LoadScene ("start_menu");
}
}
}
2.過關條件判斷
因為我們程式的寫法是一直累加或減角度,導致最後數值會大於或小於360度,所以在做條件判斷時需將數值除以180取餘數,以取得正確的數值
if (angle > 45 && angle < 135) {
if (rotat.y > 0){
a+=3.0f;
if(a>180.0f)
a%=180.0f;
}
else{
a-=3.0f;
if(a<-180.0f)
a%=180.0f;
}
}
else {
if (rotat.x>0){
b+=3.0f;
if(b>180.0f)
b%=180.0f;
}
else{
b-=3.0f;
if(b<-180.0f)
b%=180.0f;
}
}
完成後跟老師討論,發現按壓旋轉的方式非常不方便,於是更改為滑動方式並加入過關條件
1.更改程式碼如下
using UnityEngine;
using System.Collections;
using UnityEngine.SceneManagement;
[RequireComponent(typeof(SteamVR_TrackedObject))]
public class ControllerTest : MonoBehaviour {
SteamVR_TrackedObject trackedObj;
SteamVR_Controller.Device device,deviceLeft,deviceRight;
public GameObject obj;
float a=0.0f,b=0.0f,c=0.0f;
Vector2 rotat=new Vector2(0.0f,0.0f);
public static bool over=false;
void Start () {
trackedObj=GetComponent<SteamVR_TrackedObject>();
a=obj.transform.rotation.x;
b=obj.transform.rotation.y;
c=obj.transform.rotation.z;
}
// Update is called once per frame
Vector2 tp2;
bool bTouched=false;
void Update () {
device = SteamVR_Controller.Input ((int)trackedObj.index);
var leftHand = SteamVR_Controller.GetDeviceIndex(SteamVR_Controller.DeviceRelation.Leftmost);
deviceLeft = SteamVR_Controller.Input (leftHand);
var rightHand = SteamVR_Controller.GetDeviceIndex(SteamVR_Controller.DeviceRelation.Rightmost);
deviceRight = SteamVR_Controller.Input (rightHand);
Vector2 tp=Vector2.zero,tp1=Vector2.zero;
if (device.GetTouch (SteamVR_Controller.ButtonMask.Touchpad)){
//由原先的GetPress更改為GetTouch
tp2 = tp1;//備份第一次碰到的位置
tp1 = device.GetAxis ();//備份完後再讀取Touchpad碰到的位置
if(bTouched){
rotat=tp1-tp2;
//print("tp1:"+tp1+"\n");
//print("tp2:"+tp2);
//print("diff:"+ (tp1-tp2));
///....
float angle=Vector2.Angle (new Vector2 (1, 0), rotat);
if (angle > 45 && angle < 135) {
if (rotat.y > 0){
a+=3.0f;
if(a>180.0f)
a%=180.0f;
}
else{
a-=3.0f;
if(a<-180.0f)
a%=180.0f;
}
}
else {
if (rotat.x>0){
b+=3.0f;
if(b>180.0f)
b%=180.0f;
}
else{
b-=3.0f;
if(b<-180.0f)
b%=180.0f;
}
}
}
bTouched=true;
}
else
bTouched=false;
obj.transform.rotation = Quaternion.Euler (new Vector3 (a, b, c));
if((a<=-5.0f && a>=-25.0f) && (b<=80.0f && b>=60.0f)){
//若物件達到指定角度
over=true;
SceneManager.LoadScene ("start_menu");
}
}
}
2.過關條件判斷
因為我們程式的寫法是一直累加或減角度,導致最後數值會大於或小於360度,所以在做條件判斷時需將數值除以180取餘數,以取得正確的數值
if (angle > 45 && angle < 135) {
if (rotat.y > 0){
a+=3.0f;
if(a>180.0f)
a%=180.0f;
}
else{
a-=3.0f;
if(a<-180.0f)
a%=180.0f;
}
}
else {
if (rotat.x>0){
b+=3.0f;
if(b>180.0f)
b%=180.0f;
}
else{
b-=3.0f;
if(b<-180.0f)
b%=180.0f;
}
}
2019年5月14日 星期二
week13 Jie
旋轉物件(三)
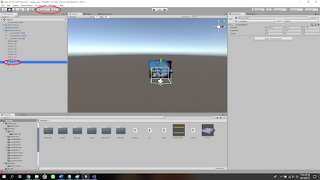
1.於Maya建好的鳥模型
(原先預計使用鳥羽毛的貼圖,但模型太多面不好貼,最後更改為金屬色)

2.放入Unity後與原先的Cube做替換。並關閉自然光加入Spot light達成投影效果

3.實際執行旋轉後發現旋轉中心並不在模型中央,於是Google尋找解決方法
網址:https://blog.xuite.net/ljs.ctk/multimedia/454299781-Unity+%E6%94%B9%E8%AE%8A%E7%89%A9%E4%BB%B6%E7%9A%84%E8%BB%B8%E5%BF%83
解決方法:加入空物件作為新的旋轉中心,並調整世界座標位置
下週預計加入過關條件
1.於Maya建好的鳥模型
(原先預計使用鳥羽毛的貼圖,但模型太多面不好貼,最後更改為金屬色)

2.放入Unity後與原先的Cube做替換。並關閉自然光加入Spot light達成投影效果

3.實際執行旋轉後發現旋轉中心並不在模型中央,於是Google尋找解決方法
網址:https://blog.xuite.net/ljs.ctk/multimedia/454299781-Unity+%E6%94%B9%E8%AE%8A%E7%89%A9%E4%BB%B6%E7%9A%84%E8%BB%B8%E5%BF%83
解決方法:加入空物件作為新的旋轉中心,並調整世界座標位置

下週預計加入過關條件
2019年5月7日 星期二
week12 Jie
旋轉物件(二)
1.以上週的程式碼,加入Touchpad的控制做修改
(在紅色圈圈拉入欲旋轉之物件)

2.程式碼如下
using UnityEngine;
using System.Collections;
public class ControllerTest : MonoBehaviour {
SteamVR_TrackedObject trackedObj;
SteamVR_Controller.Device device;
public GameObject obj;
float a=0.0f,b=0.0f,c=0.0f;
Vector2 rotat=new Vector2(0.0f,0.0f);
public static bool over=false;
void Start () {
trackedObj=GetComponent<SteamVR_TrackedObject>();
a=obj.transform.rotation.x;//將欲旋轉物件的x,y,z軸資訊給予控制用的變數
b=obj.transform.rotation.y;
c=obj.transform.rotation.z;
}
// Update is called once per frame
Vector2 tp2;
bool bTouched=false;
void Update () {
device = SteamVR_Controller.Input ((int)trackedObj.index);
Vector2 tp=Vector2.zero,tp1=Vector2.zero;
if (device.GetPress (SteamVR_Controller.ButtonMask.Touchpad)){//若按壓Touchpad
tp1 = device.GetAxis ();//讀取Touchpad資訊
float angle=Vector2.Angle (new Vector2 (1, 0), rotat);
//計算按壓位置與向量(1,0)之間的角度,好分別按下的是上下左右
if (angle > 45 && angle < 135) {//若按下上或下
if (rotat.y > 0){//上
a+=3.0f;//角度加3度
}
else{ //下
a-=3.0f;
}
}
else {//若按下左或右
if (rotat.x>0){//左
b+=3.0f;
}
else{//右
b-=3.0f;
}
}
}
obj.transform.rotation = Quaternion.Euler (new Vector3 (a, b, c));
//將計算完的角度值給予物件
}
}
1.以上週的程式碼,加入Touchpad的控制做修改
(在紅色圈圈拉入欲旋轉之物件)

2.程式碼如下
using UnityEngine;
using System.Collections;
public class ControllerTest : MonoBehaviour {
SteamVR_TrackedObject trackedObj;
SteamVR_Controller.Device device;
public GameObject obj;
float a=0.0f,b=0.0f,c=0.0f;
Vector2 rotat=new Vector2(0.0f,0.0f);
public static bool over=false;
void Start () {
trackedObj=GetComponent<SteamVR_TrackedObject>();
a=obj.transform.rotation.x;//將欲旋轉物件的x,y,z軸資訊給予控制用的變數
b=obj.transform.rotation.y;
c=obj.transform.rotation.z;
}
// Update is called once per frame
Vector2 tp2;
bool bTouched=false;
void Update () {
device = SteamVR_Controller.Input ((int)trackedObj.index);
Vector2 tp=Vector2.zero,tp1=Vector2.zero;
if (device.GetPress (SteamVR_Controller.ButtonMask.Touchpad)){//若按壓Touchpad
tp1 = device.GetAxis ();//讀取Touchpad資訊
float angle=Vector2.Angle (new Vector2 (1, 0), rotat);
//計算按壓位置與向量(1,0)之間的角度,好分別按下的是上下左右
if (angle > 45 && angle < 135) {//若按下上或下
if (rotat.y > 0){//上
a+=3.0f;//角度加3度
}
else{ //下
a-=3.0f;
}
}
else {//若按下左或右
if (rotat.x>0){//左
b+=3.0f;
}
else{//右
b-=3.0f;
}
}
}
obj.transform.rotation = Quaternion.Euler (new Vector3 (a, b, c));
//將計算完的角度值給予物件
}
}
下週預計加入投影效果以及實際使用的物件
2019年4月30日 星期二


2019年4月23日 星期二
week10 Jie
介紹Leap Motion
1.Leap Motion外盒

2.裡面附有USB傳輸線及紅外面攝影機

3.執行結果如下
(因使用紅外線在室內使用干擾較少、效果較佳,若兩隻手重疊會誤判造成手部變形)


1.Leap Motion外盒

2.裡面附有USB傳輸線及紅外面攝影機

3.執行結果如下
(因使用紅外線在室內使用干擾較少、效果較佳,若兩隻手重疊會誤判造成手部變形)


2019年4月9日 星期二
week08 Jie
期末作品製作
作品名稱:密室逃脫
說明:玩家需完成各種關卡,以取得密碼逃出密室
預計的關卡如下:

預計困難點:
作品名稱:密室逃脫
說明:玩家需完成各種關卡,以取得密碼逃出密室
預計的關卡如下:

預計困難點:
1.人物移動:利用TouchPad移動時,若轉頭時按前進,前進方向是否會朝者轉頭方向移動。
2.模型投影:判斷投影正確時的角度並觸發機關。
3.機關觸發:判斷是否達成條件的方法。
2019年3月26日 星期二
week06 Jie
根據手把位置產生物件
1.結果如下

2.程式碼如下
using System.Collections;
using System.Collections.Generic;
using UnityEngine;
using Valve.VR;
public class controller_ball : MonoBehaviour
{
// Start is called before the first frame update
public SteamVR_Action_Boolean triggerDown;//宣告Trigger所需的布林變數
public GameObject ball;//宣告生成球體用的變數
public GameObject controller_pos;//宣告記錄手把位址的變數
bool state=false;
void Update()
{
if(triggerDown.GetState(SteamVR_Input_Sources.Any))
{
if(state==false)
{
state=true;
print("triggerDown");
GameObject now=Instantiate(ball);//生成球體
now.transform.position=controller_pos.transform.position;//將手把位址給予球體
}
}
else
{
state=false;
}
}
}
1.結果如下

2.程式碼如下
using System.Collections;
using System.Collections.Generic;
using UnityEngine;
using Valve.VR;
public class controller_ball : MonoBehaviour
{
// Start is called before the first frame update
public SteamVR_Action_Boolean triggerDown;//宣告Trigger所需的布林變數
public GameObject ball;//宣告生成球體用的變數
public GameObject controller_pos;//宣告記錄手把位址的變數
bool state=false;
void Update()
{
if(triggerDown.GetState(SteamVR_Input_Sources.Any))
{
if(state==false)
{
state=true;
print("triggerDown");
GameObject now=Instantiate(ball);//生成球體
now.transform.position=controller_pos.transform.position;//將手把位址給予球體
}
}
else
{
state=false;
}
}
}
2019年3月19日 星期二
week05 Jie
更改Unity Skybox貼圖
1.創建新材質

2.更改Shader為Panoramic

3.放入新圖片

4.查看結果

5.加入程式碼(360度的立體音效)

6.音效的相關數據

7.加入Audio Source元件才可播放音效(Camera需加入Audio Listener才聽得到聲音)

2019年3月12日 星期二
week04 Jie
安裝 Visual Studio Code編譯器
Unity從2018版本開始停止支援MonoDevelop,內建的Visual Studio因為登入程序繁瑣,所以決定使用老師推薦的Visual Studio Code。
1.前往Visual Studio Code官網下載

2.執行並安裝

3.需額外下載SDK(Visual Studio Code安裝完後會詢問是否要安裝並提供網址)

4.若不懂也可上網搜尋教學

5.下載SDK並安裝

6.需安裝相關插件,才可編譯相關程式
(教學裡也有提到,分別是 C#、及Unity相關插件)

7.Unity也需到Asset Store下載VSCode package

8.更改Unity預設編譯器為Visual Studio Code
(Edit>>Preferences>>External Tools>>External Script Editor)

9.試跑上禮拜的程式看是否成功


2019年3月5日 星期二
week03 Jie
製作簡易VR眼鏡
1.未開封時之包裝

2.Google圖片搜尋VR Cardboard的製作步驟

3.下圖為完成品

按下手把Trigger產生震動
1.程式碼

2.完成程式碼後,需做其它後台設定
(Unity視窗中 Window>>SteamVR Input>>Save and generate>>Open building UI)

3.按壓後產生震動,很好玩但也很耗電

2019年2月26日 星期二
week02 Jie
設定vive相關設定
1.搜尋vive setup 安裝vive安裝檔

2.下載完成後,執行硬體設置

3.執行房間設定


4.設定完成後可開啟顯示器鏡射觀看VR眼鏡畫面

5.若收不到基地台訊號,可在Steam VR的設定中查看房間慨覽觀察訊號


1.搜尋vive setup 安裝vive安裝檔

2.下載完成後,執行硬體設置

3.執行房間設定


4.設定完成後可開啟顯示器鏡射觀看VR眼鏡畫面

5.若收不到基地台訊號,可在Steam VR的設定中查看房間慨覽觀察訊號


訂閱:
文章 (Atom)